Fastest Android Wall Charger?

I accidentally discovered that the fastest charger for my Motorola Atrix so far is actually a Barnes & Noble Nook charger. I’m blogging about this because the charging time of Atrix is a major point of contention, and it drives me crazy.

My Atrix takes forever to charge with the Original Equipment (OEM) factory charger. For the record, I’ve never been impressed with Micro-USB chargers. If the battery is around 30% – 40% when first plugged into the charger, it takes up to 5 – 6 hours to reach a full charge. This is painfully long especially in comparison to my retired Google Ion that always seemed to get fully charged in less than an hour. Often-times I walk-around with a half-charged phone because every time I pull it off the charger to go to a meeting, it has only charged a fraction of a percentage more than it had an hour earlier.
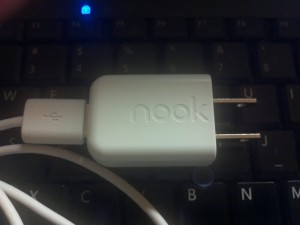
I’ve tried a number of different chargers including ones from my HTC EVO. Then at a recent out-of-town trip, I lost my factory charger and decided that since the Nook charger had the same type of USB plug, same voltage and amperage rating that I’d give it a try. At the time that seemed better than running out and buying a new one at the AT&T store. What happened next really surprised me. The Atrix charged from 50% to 100% in about two hours. In general, this charger consistently charged my phone faster.

Now before you blast me about slow chargers are the best way to go, keep in mind this was just an experiment and this post comes with a large amount of CAVEAT EMPTOR:

  • WARNING – Motorola ONLY recommends using approved chargers with their phones, so if you mess up your battery or phone don’t blame me. Furthermore, if you run out and purchase a Nook charger there is no gaurantee it will perform the same.

If you’ve had any better/different experiences with other charges please post a comment.

Reference:

Barnes & Nobel Nook Charger – Model No. BNRP5-850, Output: 5v @ 0.85A
Debugging Flex-AIR apps on iPhone and iPad

Debugging iPad or iPhone apps that you built with FlashBuilder has a number of extra steps that you don’t need when developing with Android. This is especially true if you use Windows as your primary operating system. The good news is that once you’ve done it once or twice it should be fairly straight forward. So here are a few hints to get you going.

Step 0. If you are building on Windows make sure to install the latest version of iTunes. Then check that your iPad or iPhone can be synched with iTunes. If you use a mac you’ve most likely already done this step (in your sleep a hundred times).

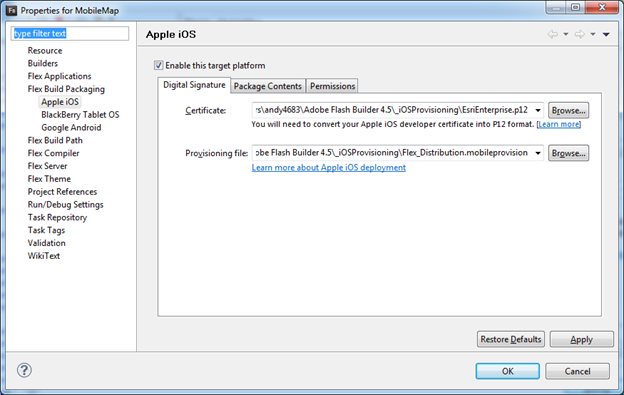
Step 1. Make sure you have a certificate and provisioning file. This must be configured under FlashBuilder Project > Properties > Flex Build Packaging. IMPORTANT: If the certificate and provisioning file are not set up or are not valid you will not be able to compile your project. If you don’t know what this is or how to do it, additional info can be found here in a great blog post by Holly Schinsky (@devgirlFL).

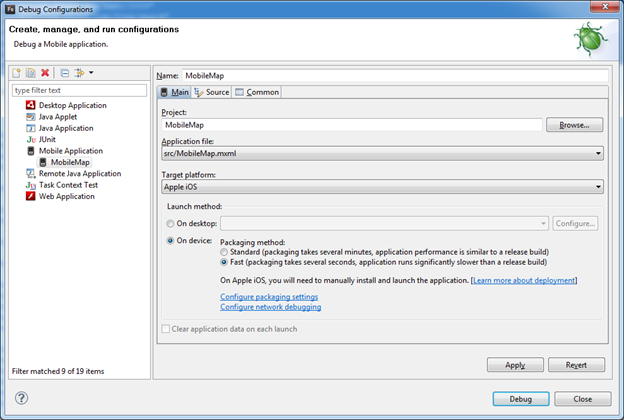
Step 2. Set up a Debug Configuration. If you don’t know where that is, select the pulldown next to the bug icon on the FlashBuilder toolbar and then choose Debug Configuration, or go to Run > Debug Configurations. Choose Apple iOS as your Target Platform. Be sure to select the On Device Packaging Method > Fast! If you don’t do this and you choose the Standard option it will take five or more minutes to compile the build each time you hit debug, and that can become a huge time waster really fast. One advantage of using the Standard option is it will perform more like the final release build. In comparison, the Fast version won’t be as performant. So, for the vast majority of your debugging you should probably use Fast, and when you want to test a final build then you might want to choose Standard. When you are ready select the Debug button.

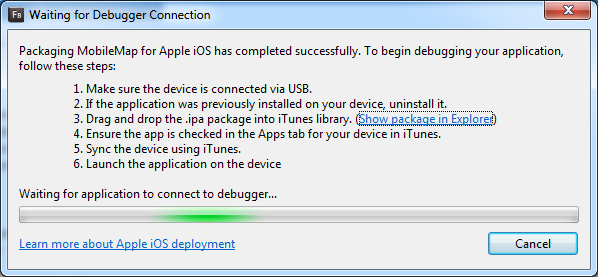
Step 3.  You will then see a popup window with six important instructions. Once you have completed Steps one and two, select the Show package in Explorer link.

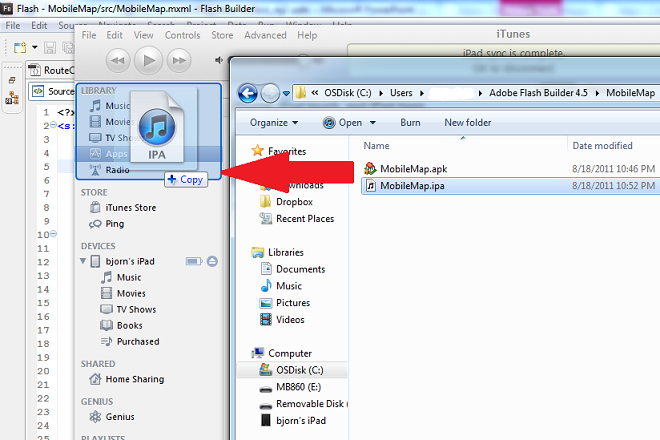
Step 4. Drag the .ipa file from your file browser window into the iTunes Library > Apps area.

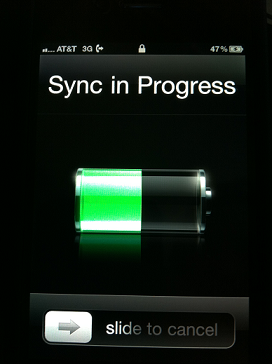
Step 5. Select the Sync button on the bottom right hand corner of iTunes. You should see Sync In Progress screen on your device. Let the operation complete. When it’s finished you should see a message in the message box at the top of iTunes that says the sync was successful. If there was an error it will also show up in the message box at the top of the iTumes application window.

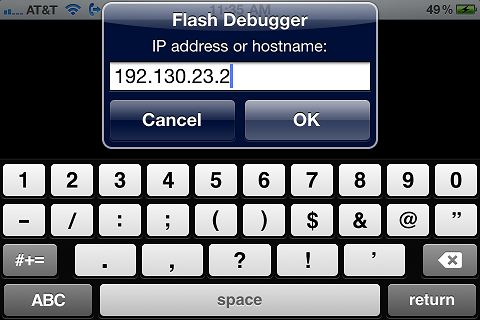
Step 6. Launch the application on your iPad or iPhone. You should get a popup window titled Flash Debugger that asks for the IP address or hostname.  Important:  your iPad or iPhone and your development machine need to be on the same wireless LAN, if they aren’t then this step won’t work. If you don’t have a wireless LAN handy you can always log both machines into a MiFi or some other type of mobile hotspot. Then enter the IP address of your development machine. On a windows machine you can easily get that in a DOS prompt using the command ipconfig. Hit OK.

The Final Result. If all goes well the app will launch and you will start to see debugging output in FlashBuilder.

Adobe Flex Mobile: Detecting View and Orientation Change with Event Listeners

There will be a time when you want to have more control over the transitions between Adobe Flex Views, or detecting when the device orientation changes. For example, I recently built an app that had some event listeners that stayed persistent even when the user changed views. So, I needed to listen for the change event when using tabbed view navigator <s:TabbedViewNavigatorApplication/> so I could remove those event listeners and I did it like this:

this.addEventListener(Event.REMOVED_FROM_STAGE,tabChangeHandler);

I also had a need to detect when the phone was tilted. Yeh, in a perfect world everything in the app’s user interface would automatically adjust to the new state, but that isn’t always the case especially when building more complex apps. What I did was listen for orientation changes like this:

stage.addEventListener(StageOrientationEvent.ORIENTATION_CHANGE,stageOrientationChangeHandler);

Even if you are using some other Flex methodology for your mobile app, hopefully these examples will give you some ideas!